Thursday, January 27, 2011

Blueberry Scones

Oooh baby!

Photobucket


These scones were... oh my gosh. I can't even describe how tasty these were. And you're probably thinking, 'Woah girl. Chill. They're scones." And yeah, I know this. But seriously...melt in your mouth crumbles...totes noms.

But once again, I have to apologize for being a bad blogger, with the excuse that I wasn't actually planning on blogging when I made these. With that said: I have to inform you that I have no recipe to share with you. So really I shouldn't have hyped these up so much. However, now that I look back on it, I remember not being able to find a "to die for" recipe and I wanted to concoct The Perfect Scone. And I did so by combining elements of a few different recipes and kind of just going with the flow. All without writing down my modifications. Boo.

Since I've failed you, my dear readers, I will attempt to make it up by sharing a "best scone ever" recipe I've recently come across on the interwebz, but haven't tried yet. When I do finally make these, I'll be sure to share the results.

Here is the American Test Kitchen Cookbook's "Dreamy Cream Scones" recipe, which I found posted on one of my favorite blogs, Smitten Kitchen.
And here's the link to that blog if you want to check it out :)
http://smittenkitchen.com/

Dreamy Cream Scones
America’s Test Kitchen Cookbook

2 cups (10 ounces) unbleached all-purpose flour, preferably a low-protein brand such as Gold Medal or Pillsbury
1 tablespoon baking powder
3 tablespoons sugar
1/2 teaspoon salt
5 tablespoons chilled, unsalted butter, cut into 1/4-inch cubes
1/2 cup currants (I used dried cranberries, and chopped them into smaller bits)
1 cup heavy cream

1. Adjust oven rack to middle position and heat oven to 425°F.

2. Place flour, baking powder, sugar and salt in large bowl or work bowl of food processor fitted with steel blade. Whisk together or pulse six times.

3. If making by hand, use two knives, a pastry blender or your fingertips and quickly cut in butter until mixture resembles coarse meal, with a few slightly larger butter lumps. Stir in currants. If using food processor, remove cover and distribute butter evenly over dry ingredients. Cover and pulse 12 times, each pulse lasting 1 second. Add currants and pulse one more time. Transfer dough to large bowl.

4. Stir in heavy cream with a rubber spatula or fork until dough begins to form, about 30 seconds.

5. Transfer dough and all dry, floury bits to countertop and knead dough by hand just until it comes together into a rough, sticky ball, 5 to 10 seconds. Form scones by either a) pressing the dough into an 8-inch cake pan, then turning the dough out onto a lightly floured work surface, cutting the dough into 8 wedges with either a knife or bench scraper (the book’s suggestion) or b) patting the dough onto a lightly floured work surface into a 3/4-inch thick circle, cutting pieces with a biscuit cutter, and pressing remaining scraps back into another piece (what I did) and cutting until dough has been used up. (Be warned if you use this latter method, the scones that are made from the remaining scraps will be much lumpier and less pretty, but taste fine. As in, I understand why they suggested the first method.)

6. Place rounds or wedges on ungreased baking sheet and bake until scone tops are light brown, 12 to 15 minutes. Cool on wire rack for at least 10 minutes. Serve warm or at room temperature.


Tuesday, January 25, 2011

Apple Streusel Amaretto Cupcakes (but really just muffins)

Photobucket

Photobucket

These were best when they were still hot out of the oven, especially with the amaretto icing being all melty-like. On a scale of 1-1o I'd give this recipe a 7. They were good but I don't think I'd use this particular recipe again. The whole apple and amaretto concept is great though, so maybe I'll experiment with that again sometime in the future.

Now that I look back at recipe, maybe the fact that this came from Cooking Light is the reason they didn't turn out so great. I mean, really. A light cupcake recipe? Who are we kidding?

So here's the recipe. And here's where I got it from:
http://traceysculinaryadventures.blogspot.com/2010/10/amaretto-apple-streusel-cupcakes.html

The only change I made is that I added extra amaretto to the icing, to give some extra-almondy oomph.

Amaretto Apple Streusel Cupcakes
from Cooking Light


Streusel
2 tablespoons all-purpose flour
2 tablespoons light brown sugar
1/4 teaspoon ground cinnamon
2 tablespoons butter, chilled
2 tablespoons sliced almonds

Cupcakes
6.75 ounces (about 1 1/2 cups) all-purpose flour
1/2 teaspoon baking powder
1/4 teaspoon salt
1/4 teaspoon baking soda
3/4 cup granulated sugar
1/4 cup (2 ounces) reduced fat cream cheese, softened
1/4 cup butter (4 tablespoons), softened
2 tablespoons amaretto
1 teaspoon vanilla extract
1 egg
1/2 cup reduced-fat sour cream
1/4 cup milk
3/4 cup finely chopped Gala (or your favorite - I used Macintosh) apple
1 tablespoon all-purpose flour

Glaze
1 cup confectioners' sugar
4 teaspoons 2% milk

Preheat oven to 350 F. Line a 12-cup muffin tin with paper liners.

Prepare the streusel by combining the flour, brown sugar, and ground cinnamon in a small bowl. Cut in 2 tablespoons butter with a pastry blender or 2 knives until mixture resembles coarse meal then stir in the almonds. (You could also do this in a mini prep, which I find easier, even if it means more dirty dishes.) Place the streusel in the fridge while you make the cupcake batter.

In a medium bowl, whisk together the flour, baking powder, baking soda and salt. In the bowl of a stand mixer fitted with the paddle attachment, cream the butter, cream cheese and granulated sugar on medium speed until fluffy. Add the amaretto, vanilla extract and egg to the bowl and beat at medium speed until well blended. Combine the sour cream and milk in a measuring cup and whisk until completely blended. Alternately add the flour mixture and the sour cream/milk combo to the mixer bowl, beginning and ending with the flour mixture and beating only until the dry ingredients are just incorporated.

Toss the chopped apple pieces with 1 tablespoon of flour in a small bowl. Fold the apple mixture into the batter with a rubber spatula. Divide the batter evenly among the muffin cups.

Remove the streusel from the fridge and sprinkle evenly over the cupcakes. Bake for 20-24 minutes or until a toothpick inserted in the center comes out clean. Cool in the pan for 5-10 minutes on a wire rack, then remove the cupcakes from pan to cool completely on the rack.

To prepare the glaze, whisk the confectioners' sugar and milk in a small bowl until smooth. Drizzle glaze over cupcakes.

Makes 12 cupcakes


Monday, January 24, 2011

Mini Black-Bottom Cheesecakes

Nomnomnom

Photobucket


Photobucket


and some chive blossoms for good measure..

Photobucket


Warning: While delectable, these were very rich. Which is nice for portion control reasons because this is one of the few mini desserts where one really does feel like enough. However, eating more than one is also quite acceptable :)

Here is the link to the recipe for these classy little bliss-morsels:

http://thefoodaddicts.com/mini-black-bottom-cheesecakes-with-jam/


Serving suggestion for partayyys:

Set 'em out on a big platter. stark. naked. I know, it may seem cruel. What did these little fellows ever do to you? Well.. sometimes you have to make sacrifices, and sometimes you have to make others make sacrifices. You know what I'm sayin?

Naw me neither.

Next, alongside your massive platter of joy, place small bowls of different toppings such as berries, caramel, hot fudge, assorted fruit jams, sprinkles, etc. so your guests can customize them to their liking! Totally rad!

To the right are some cute serving bowls I found at anthropologie.com, the window shopper's paradise. http://www.anthropologie.com/anthro/catalog/productdetail.jsp?navAction=jump&id=073547&parentid=SEARCH_RESULTS


A word or so about creme fraiche...
The one change I made to this recipe is that I didn't use creme fraiche. Although delicious, it's kind of spendy (7.5 oz can easily put you back 6 bucks). Creme fraiche literally means "fresh cream" in French. Here in the U.S. we make it by fermenting sour cream with pasteurized cream. The product of this process is a velvety cream substance that you can use as a topping, in sauces, or in many baked goods. It's basically a thinner version of sour cream.

Sooo.. you can do one of these two things if you don't want to make the investment or just can't find it in the store:

  1. For 1 cup of creme fraiche, use 1/2 cup each of sour cream and whipping cream.
  2. Make your own creme fraiche by combining 1 cup whipping cream and 3 tablespoons buttermilk; cover and let stand at room temp for 12 hours. Super easy, and super cheap!!

Caution: if you have leftover creme fraiche from this recipe, it only keeps for up to about ten days in the fridge. I don't want ya'll gettin' sick on me, now ya hear? It's really good whipped and sweetened, then used as a topping for.. something. Like fruits. Or oats. Or cake. Really.. whatever.

Mmm I'm making myself hungry O_o

Okay.. time for me to go. But there's my first power-post. I'm realizing now this wasn't near as short as I was hoping for it to be, but you can't blame a girl for getting excited about creme fraiche. Ya just can't.


Sunday, January 23, 2011

plans

Hello dear readers! I just wanted to let you all in on my game plan for the next week…

So. I have a lot of pictures and recipes that I’ve made that I would like to post about. When I started this blog, I know that in my introduction entry I wrote that I’d be sharing the recipes in a post labeled with the date that I actually made the recipe. However, with school started up and other new and exciting things happening here at Puget Sound, I think that I’d rather take a different course. So here is my plan: I’ll be posting a few recipes at a time- each will still get their own post- but the content will mainly just be photos, along with links to the recipes. Looking here at my spreadsheet, there are thirty-five recipes and (along photos for each of these) in my archives total and I would like to share them all with you! The thing is, I would also like to move on and start doing some new recipes and featuring some more recent food experiences. Therefore, I’m hyping myself up for some power-bloggage and I hope that my massive amounts of photos don’t overwhelm or bore you, I just want to get them onto archives here on sift, schmift.

So with that said.. here we goooooo!

Thursday, January 20, 2011

Posers

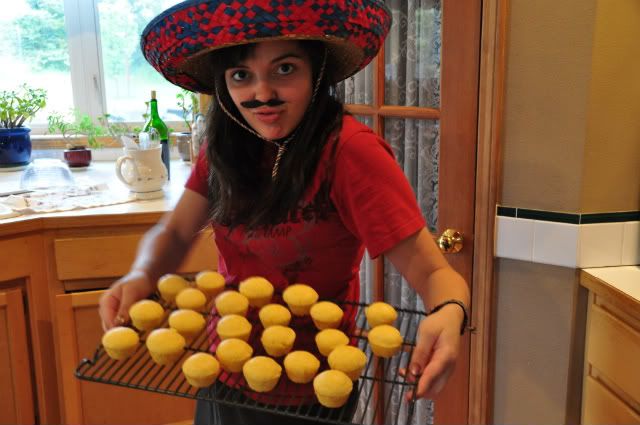
Um.. hi guys. I'm just going to start out by saying this post was constructed with a good deal of hesitance. But I decided to do it with the mindset that heck, you're going to see this side of me eventually if you haven't already. And a certain person in my life said that they'd be angry if a certain picture never turned up on my food blog when it finally came into being.

So.. yeah, it's a little embarrassing. You see, I usually don't pose with my food. Sometimes it turns out nice...

Photobucket

But usually it's something that should just be avoided altogether..


See what I mean? So.. there you have it. The real me, uncensored, and yes: very very Mexican, complete with a stache.

Or maybe more Spanish.

Can you see the resemblance?


Aaaanyway...those thumbprint cookies pictured above were made with a simple shortbread dough and an assortment of fruit jams we had in our fridge. I think I used a raspberry and a strawberry jam my mom made this summer (made with love and magical mom-powers => delicious), and the others were a mixed berry jam and an apricot jam. Despite the delicious magic mom-power jam, I have to say that, for these purposes, my favorite was the apricot jam. The flavors just really agreed. I can't really say more than that except for that these are the perfect cookie. I mean, really. These quick and easy treats are light and buttery, crumbly and melty-in-your-mouthy, and the jams add the perfect amount of sweetness.

Because I don't remember what recipe I used for those, I'll share the links for some other really tasty-looking versions that I've been wanting to try...

These ones from over at Cozy Kitchen are topped with salted caramel. Mmmm...

http://www.acozykitchen.com/salted-caramel-thumbprint-cookies/


And these ones from The Noshery have guava paste on them:


http://thenoshery.com/2009/11/02/mantecaditos-con-guayaba-shortbread-almond-cookies-with-guava/

That would be a fun new ingredient to experiment with!

Shortbread is a good go-to cookie for just about anything, given it's versatility. You can do just about anything with it.. dip it in chocolate, top it with fruit, fill it with nuts, mix it with different extracts, cut it into cool shapes, powder it with confectioners sugar, use it as a crust... the list goes on. You just can't go wrong here because the dough is chock-full of sugar and butter, so whatever you make will end up being uber tasty :)

Saturday, May 15, 2010

Summer and Strawberry Dreams

Ah…. Summer. I can see it coming in the distance. The far, far off distance. This last summer was pretty dang ideal in my book: lots of family, BBQs, camping, a backyard pig roast, a wedding (woop woop!), biking, lake cabins, beaches, fireworks, and I could go on.. but I won't because this blog is supposed to be about food :)

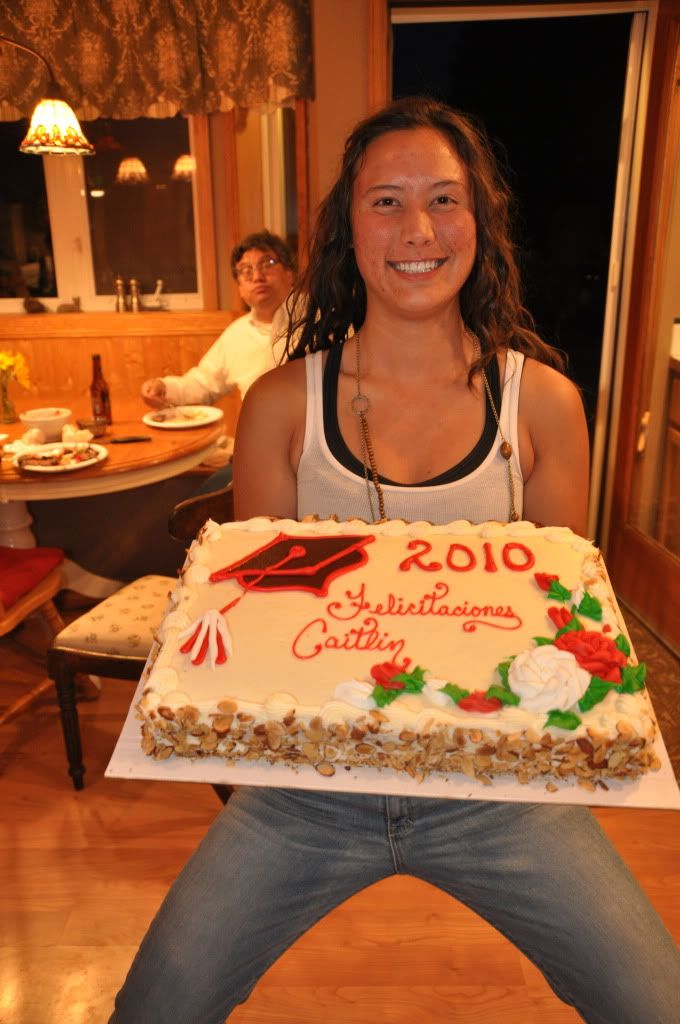
Also, this summer is actually when I did most of the baking I’ll be posting about on this blog in the next few weeks. Back in May, my cousin Caitlin graduated from Whitworth University. We had a whole bunch of family in town which was, as always, an absolute blast. After the ceremony everyone trooped over to our house for a little after partay and some good food.
Anyway, I can’t describe in words how much I love spending time with all my family in the summer, so I'm going to stop before I understate their radiance! [Love you guys! ]


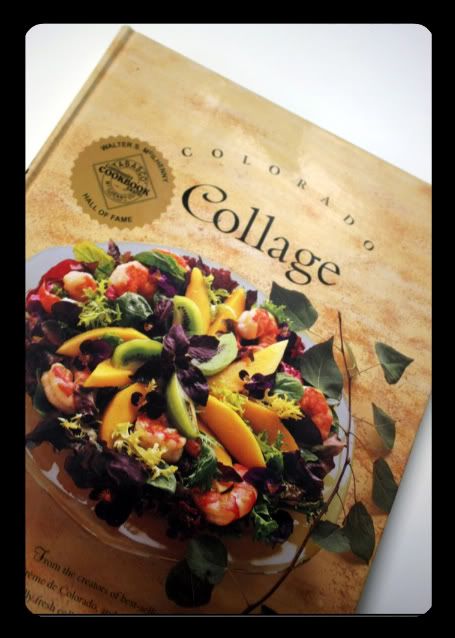
Oh and the recipe I’m sharing today is originally called Strawberry Dream Tart. I got the recipe from the Colorado Collage Cookbook from the Junior League of Denver and I just have to say, these chicks make some gooood cookbooks. Lots of pictures, really well organized, and most importantly, delicious recipes. So, if you’re ever looking for a good gift the foodie in your life, any of their number of books would suffice. I can't post the recipe cause I'm pretty sure that's illegal, but if this hasn't come across enough already, I highly reccommend buying the book, or ask me if you can borrow our copy!


So here's the tart... note my awesome apron. It's actually Marcus's. I don't think he'll really ever wear the thing, which is understandable. I mean, I guess it's a guy thing. I don't mind though! You know how the saying goes: "One man's junk..."
Haha wow I never realized how funny that saying was. Okay sorry that was inappropriate. *cough* erm..moving on..


I didn’t make any changes to this recipe, except for I threw on some blueberries, too. Also that night we had Costco’s carrot cake with the cream cheese icing- always a winner, always dangerously addictive. Finally, on top of that, my dad was being totes Grillmaster (another reason I love summer at my house) so it was a good night for food :)


Photobucket

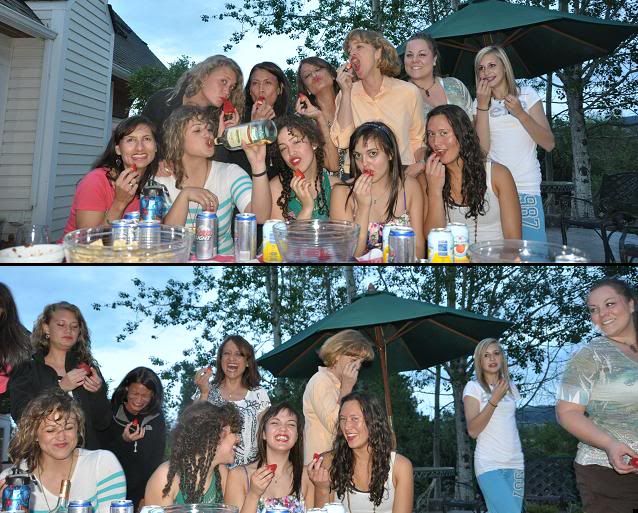
But even better than the food was the family..


Photobucket

Photobucket


Photobucket


We had the men playing with RC airplanes while the little boys were playing beerski.. hmm..


Photobucket


Photobucket
Photobucket

Okay I know I said earlier in this post that this blog is supposed to be about food, but I revise that statement and will reiterate what I said in my intro post. This blog is about food and everything good that surrounds it. Usually for me this involves family and friends, which is what you are, readers! So congrats! There is now a blog about you! <3

Friday, May 14, 2010

Cinnamon Rolls

I'm just going to start out this post by saying this: God bless the Pioneer Woman.

What an inspiring human being. A wife, a mother of four, and a damn good blogger. She does food, photography, home and garden, a section on her kids, and another one about the ranch she lives on. She's a great photographer and writer-- whether she'll admit it or not, which she won't-- and her recipes have all been positively scrumptious so far. Her writing style is so dang refreshing and she's got the best sense of humor. This is one celeb I definitely would like to meet in person one day. And she makes herself pretty accessible to her readers so this doesn't seem like too far-off of a goal!

Anyway, I'll stop going on about her. Can't give her blog justice anyway, so you should check it out for yourself sometime! http://thepioneerwoman.com/

Plus she has a really cute basset hound named Charlie. Can't get over this fellow.

This is one of the first recipes I tried of hers and I couldn't have asked for any better. These swirly little demons are what started me on the road to Pioneer Woman fandom.
Here they are in all of their cinnamony goodness waiting to go into the oven...

Photobucket

And here they are after being baked. Kind of look like a tortoise shell, don't they?
Photobucket

And smothered with cream cheese frosting... they were already being consumed before I even got the camera ready for the final shoot! Oh well, I guess that's the price to pay for following a good recipe :)

Photobucket

Ree usually uses this really tasty sounding Maple-coffee icing, but the company I was making these for requested the classics, so I went with a cream cheese icing instead. No complaints there, they turned out delicious. I don't think I'll ever use another cinnamon roll recipe. But next time I will definitely try making them with the maple-coffee icing because I absolutely love coffee in baked goods.

Here's the recipe for anyone interested in taking the venture as well!
From http://thepioneerwoman.com/cooking/2007/06/cinammon_rolls_/

Pioneer Woman's Cinnamon Rolls

Ingredients
■1 quart Whole Milk
■1 cup Vegetable Oil
■1 cup Sugar
■2 packages Active Dry Yeast
■8 cups (Plus 1 Cup Extra, Separated) All-purpose Flour
■1 teaspoon (heaping) Baking Powder
■1 teaspoon (scant) Baking Soda
■1 Tablespoon (heaping) Salt
■Plenty Of Melted Butter
■2 cups Sugar
■Generous Sprinkling Of Cinnamon
■_____
■MAPLE FROSTING:
■1 bag Powdered Sugar
■2 teaspoons Maple Flavoring
■½ cups Milk
■¼ cups Melted Butter
■¼ cups Brewed Coffee
■⅛ teaspoons Salt
Preparation Instructions

Mix the milk, vegetable oil and sugar in a pan. Scald the mixture (heat until just before the boiling point). Turn off heat and leave to cool 45 minutes to 1 hour. When the mixture is lukewarm to warm, but NOT hot, sprinkle in both packages of Active Dry Yeast. Let this sit for a minute. Then add 8 cups of all-purpose flour. Stir mixture together. Cover and let rise for at least an hour.

After rising for at least an hour, add 1 more cup of flour, the baking powder, baking soda and salt. Stir mixture together. (At this point, you could cover the dough and put it in the fridge until you need it – overnight or even a day or two, if necessary. Just keep your eye on it and if it starts to overflow out of the pan, just punch it down).

When ready to prepare rolls: Sprinkle rolling surface generously with flour. Take half the dough and form a rough rectangle. Then roll the dough thin, maintaining a general rectangular shape. Drizzle 1/2 to 1 cup melted butter over the dough. Now sprinkle 1 cup of sugar over the butter followed by a generous sprinkling of cinnamon.

Now, starting at the opposite end, begin rolling the dough in a neat line toward you. Keep the roll relatively tight as you go. Next, pinch the seam of the roll to seal it.

Spread 1 tablespoon of melted butter in a seven inch round foil cake or pie pan. Then begin cutting the rolls approximately ¾ to 1 inch thick and laying them in the buttered pans.

Repeat this process with the other half of the dough. Let the rolls rise for 20 to 30 minutes, then bake at 400 degrees (see note below) until light golden brown, about 15 to 18 minutes.

For the frosting, mix together all ingredients listed and stir well until smooth. It should be thick but pourable. Taste and adjust as needed. Generously drizzle over the warm rolls. Go crazy and don’t skimp on the frosting.

Note: My rolls don’t work for me at 400 degrees anymore. I now bake them at 375 degrees.


  • These were really fun to make and they really weren't too difficult at all! If you have any difficulties cutting the rolls neatly after rolling them up with the cinnamon, try refrigerating the logs of dough for a bit to firm them up.

    And you might as well get used to me saying now, cause I'll probably say it for almost every recipe I post on here...

These are best enjoyed fresh out of the oven!! Enjoy :)